
Folder Lock, developed by NewSoftwares.net, offers a crucial feature for protecting your data on portable media like USB drives, DVDs, or even as email attachments. This powerful tool creates a single, encrypted file (.flka) that acts as a secure, self-contained vault. It ensures that your files remain encrypted and password-protected, regardless of where they are stored or transferred. This comprehensive guide will walk you through the entire process, from creating your portable locker to using it on any other device.
Steps to Protect USB Drives, DVDs, or Email Attachments with Folder Lock
Follow following steps to Protect USB Drives, DVDs, or Email Attachments with Folder Lock
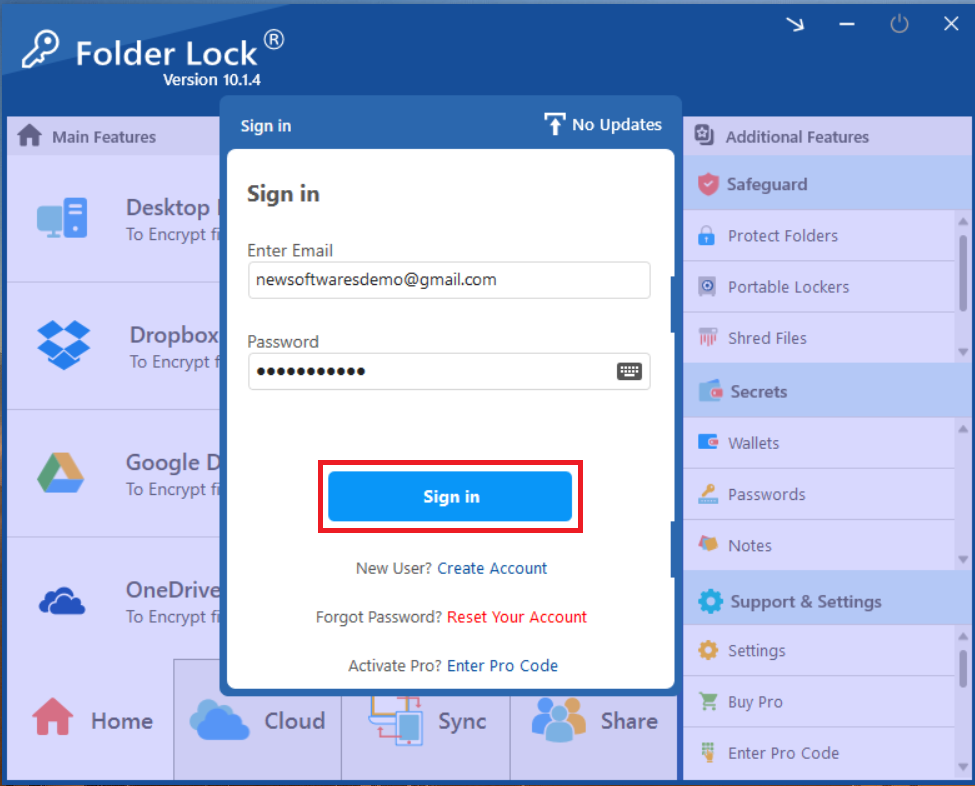
Step 1: Open Folder Lock and Log In
- Begin by launching the Folder Lock application on your computer. Locate the Folder Lock icon on your desktop or in your Start menu and double-click it.
- Once the application opens, you'll be prompted to enter your master password. Input your credentials to log into your Folder Lock account.
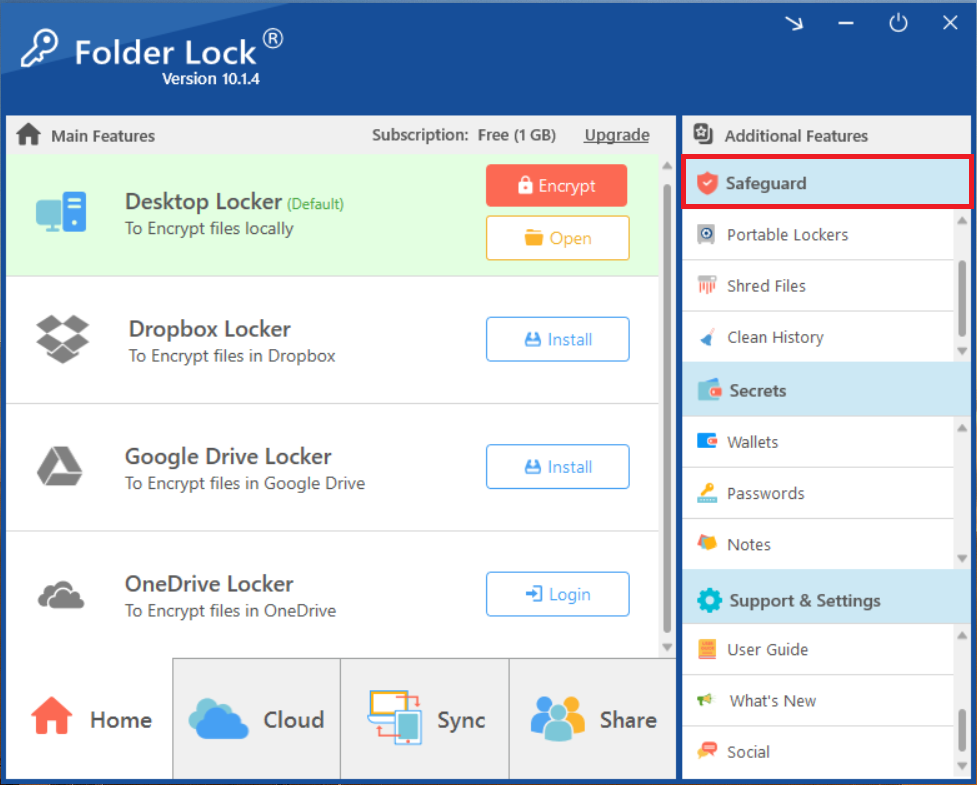
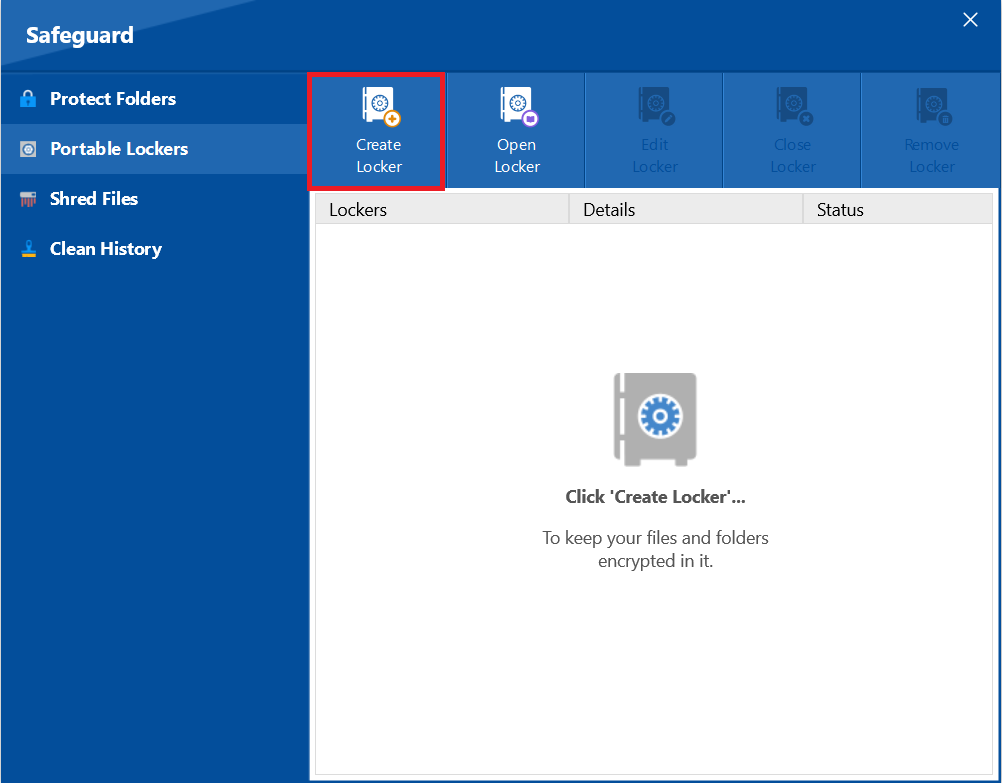
Step 2: Access the "Safeguard" Section
- On the main screen of Folder Lock, click on the "Safeguard" option. Look for the "Safeguard" tab or button in the right sidebar.
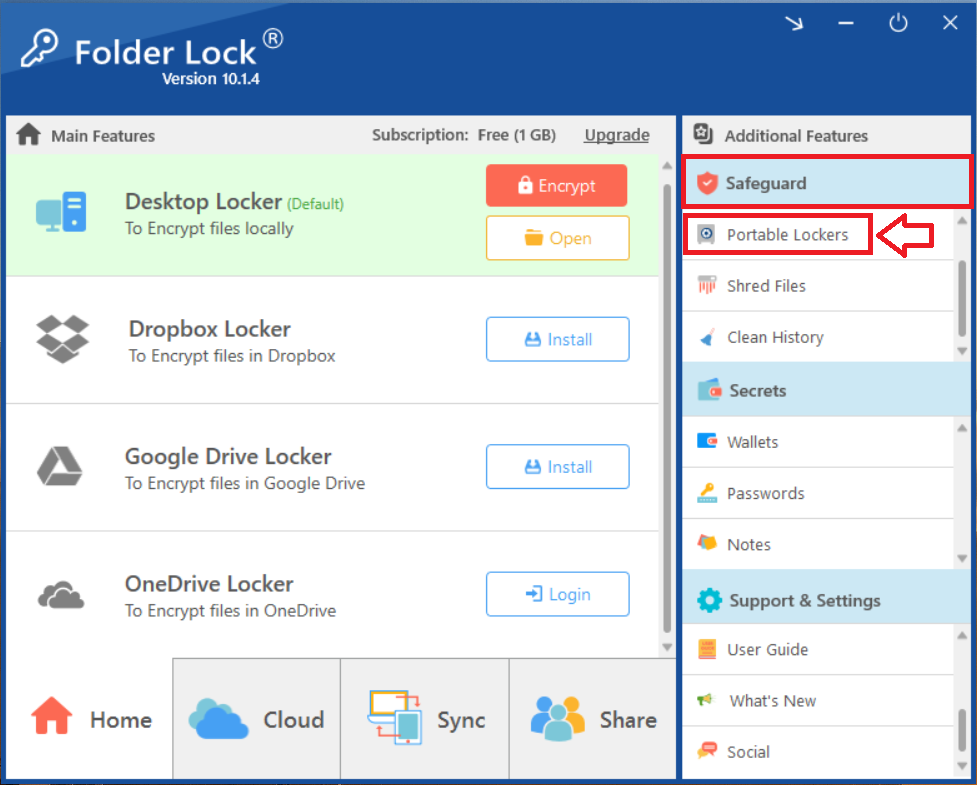
Step 3: Choose "Portable Lockers"
- Within the "Safeguard" section, select the "Portable Lockers" feature. Look for the icon or text labeled "Portable Lockers" among the options in the "Safeguard" menu and click on it. This will open the interface for creating new portable lockers.
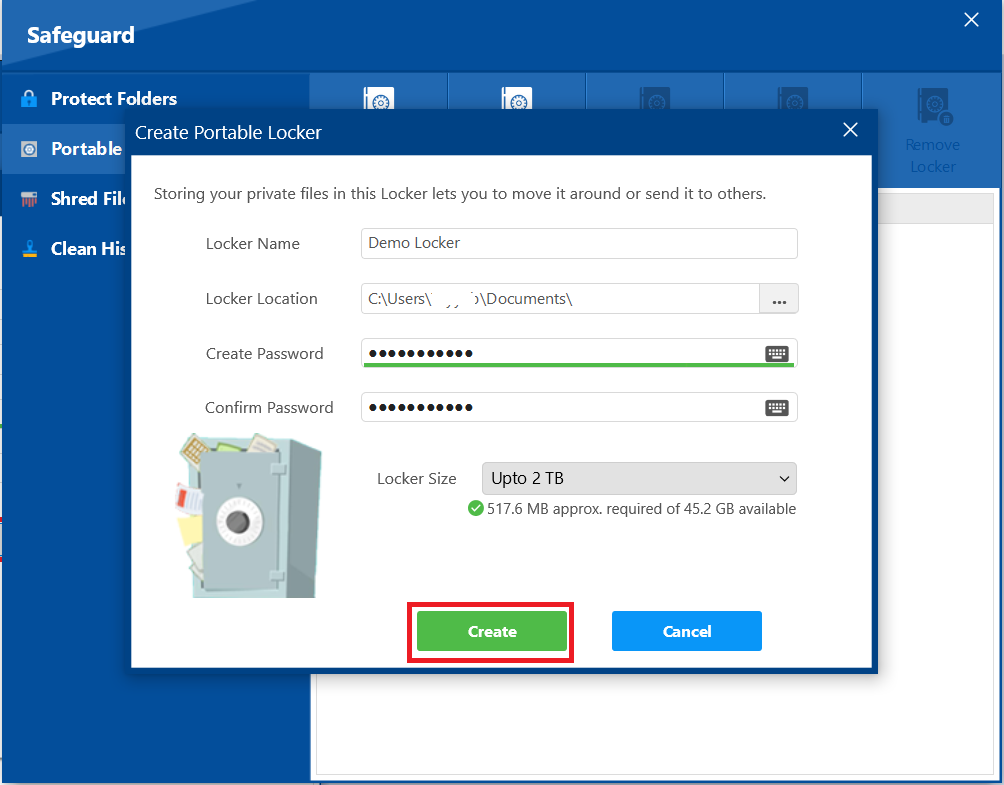
Step 4: Create Your Portable Locker
- On the interface of Portable lockers, Look for "Create Locker" and click on it.
- Clicking on Create Locker will open a new screen that displays Locker Name, Locker Location, Create Password, Confirm Password as shown in screenshot.
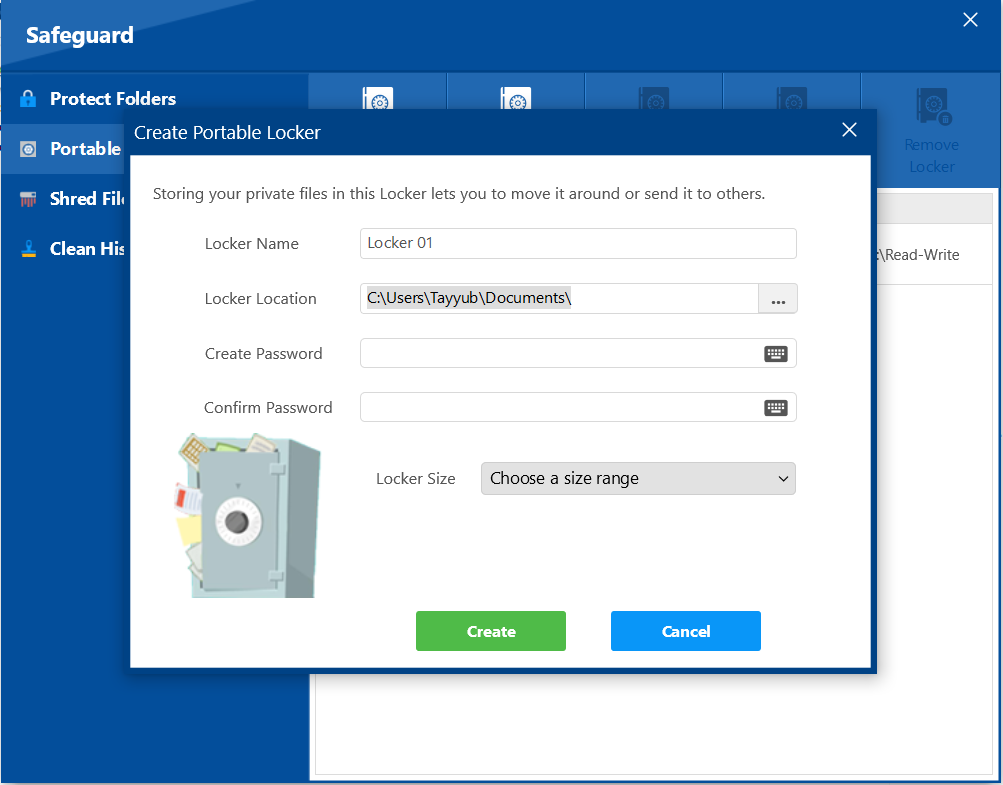
- Fill required fields i.e. Locker Location, Create Password, Confirm Password
- Locker Name. Give your portable locker a descriptive name.
- Locker Location. Choose where you want to save this locker initially; for a USB drive, save it directly to the drive, or for an email attachment, save it to your desktop first.
- Create Password. Enter a strong, unique password for this specific portable locker and confirm it.
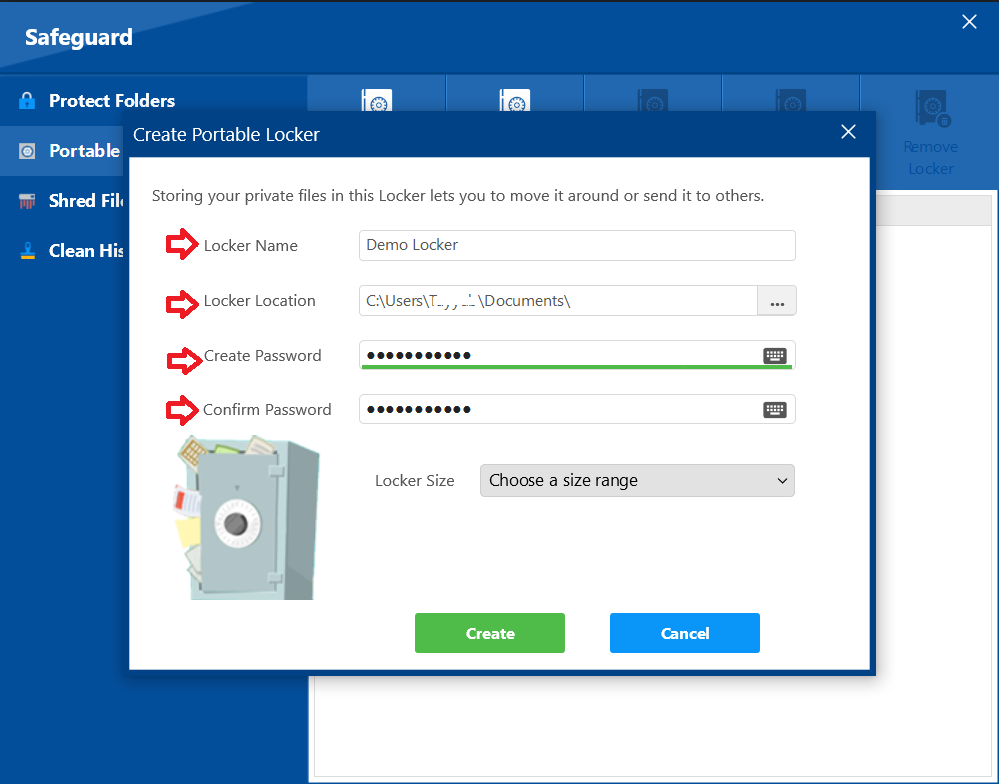
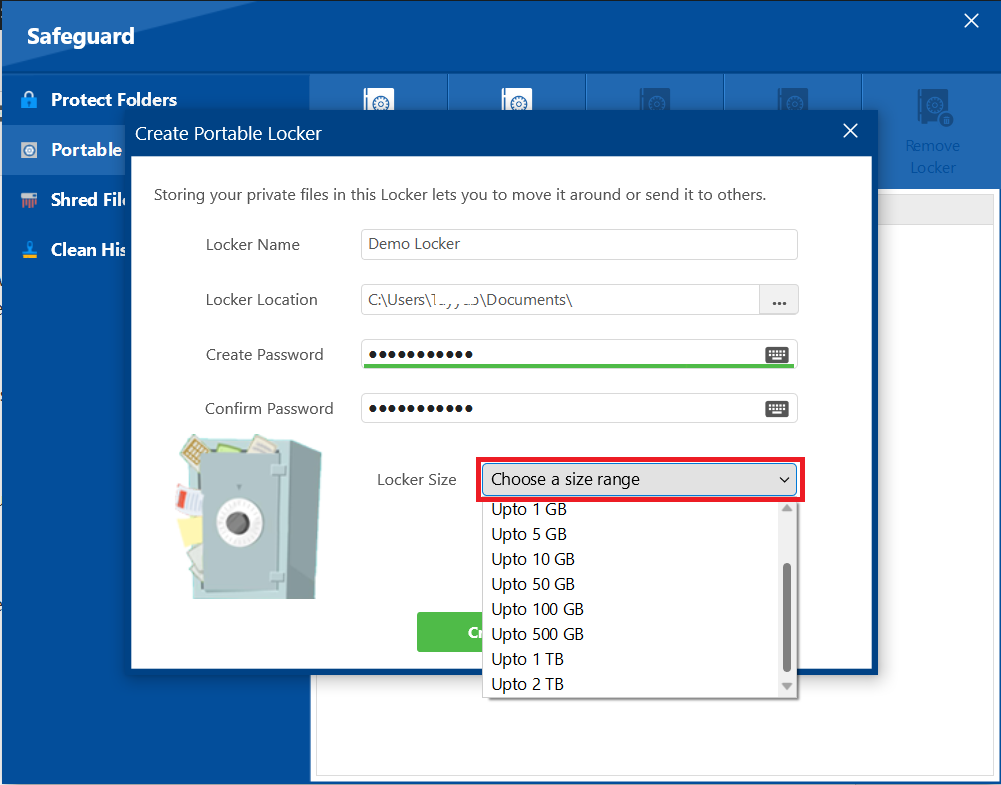
- Use the dropdown or input field to set the maximum size for your locker (up to 2 TB for Pro users).
- After setting all options, click the "Create" button to generate the portable locker file.
Step 5: Confirm Creation and Open Locker
- A confirmation pop-up titled "Portable Locker Successfully Created!" will appear.
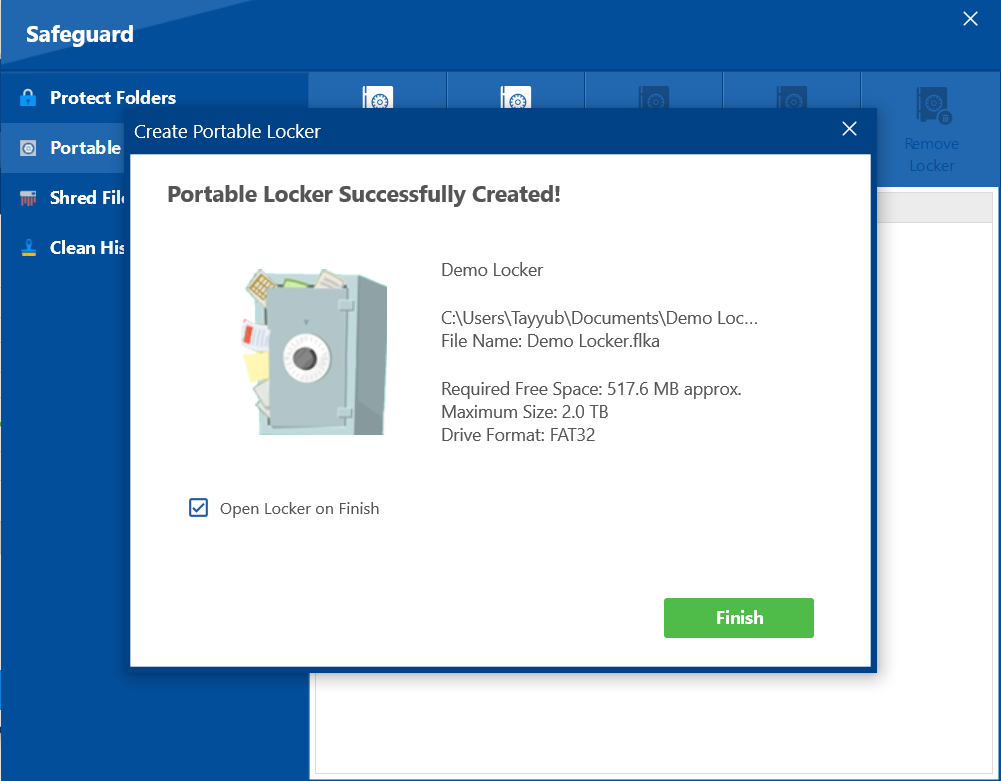
- You can choose to open the locker immediately after creation by ensuring the "Open Locker on Finish" checkbox is selected.
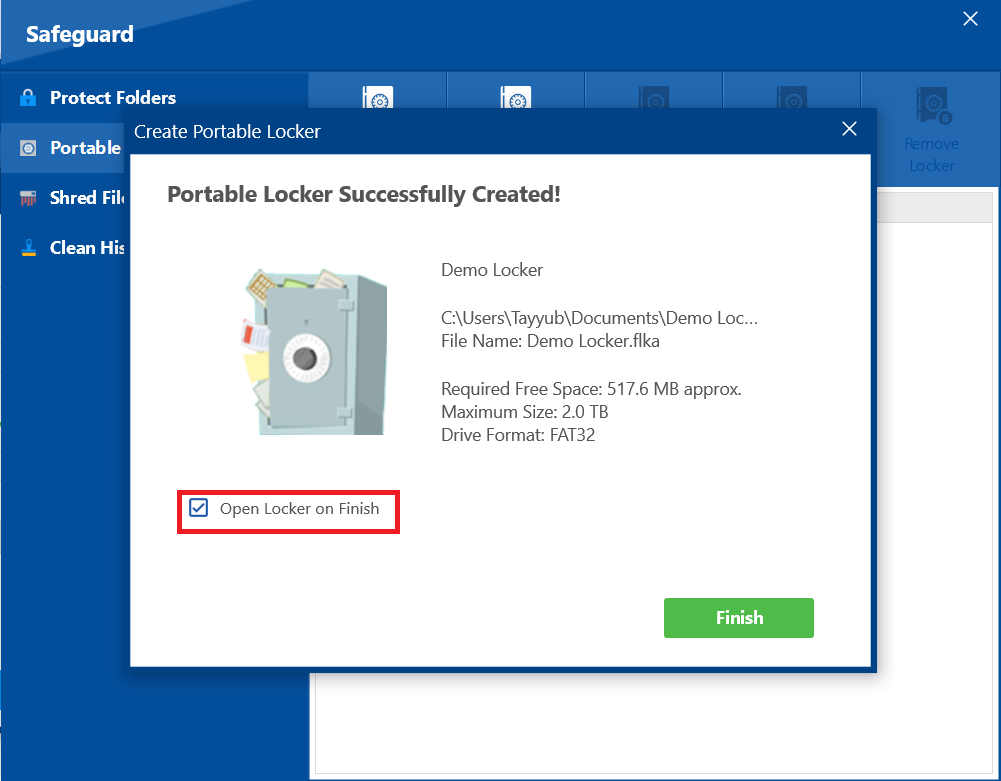
- Click the green "Finish" button to complete the process.

Step 6: Understand Initial Space Usage
When created, the portable locker file will initially take up a small amount of space, typically ranging from 30 MB to 500 MB, even if it's empty. This is the container file itself.
Step 7: Handling .FLKA File
Once your portable locker is created, it functions as a single, encrypted file (with a .flk extension) that holds all your secured data. You can handle this .flk file just like any other document on your computer. Your .FLKA file is located at the address which you choose while creating your portable locker. However, for the comprehensive overview of Locating / Accessing .FLKA file, Read How to Locate/Access My Portable Locker .FLKA File?
Here's how to use it
For USB Drives or DVDs
- Copy: Simply copy the created
.flkfile directly onto your USB drive. - Burn: If you're using a DVD, you can burn this
.flkfile onto the disc. - Access on Another Computer: When you want to access your encrypted data on a different computer, ensure Folder Lock is installed on that machine. Then, just double-click the
.flkfile, enter the password you set for it, and the locker will open, allowing you to easily drag and drop files in or out.
For Email Attachments:
Attach: You can attach the.flk file directly to an email, just like you would any other document.
Recipient Access: The person receiving the email will need to download the .flk attachment. They must also have Folder Lock installed on their computer. Once downloaded, they can double-click the .flk file, enter the correct password, and gain access to the encrypted contents.
With your portable locker now successfully created, you have a powerful and versatile security tool at your command. This simple process allows you to untether your sensitive data, ensuring it remains encrypted and protected even when it is moved to a USB drive, a DVD, or sent as an email attachment. You can now confidently carry or share your confidential information, secure in the knowledge that your privacy is maintained wherever your files travel.