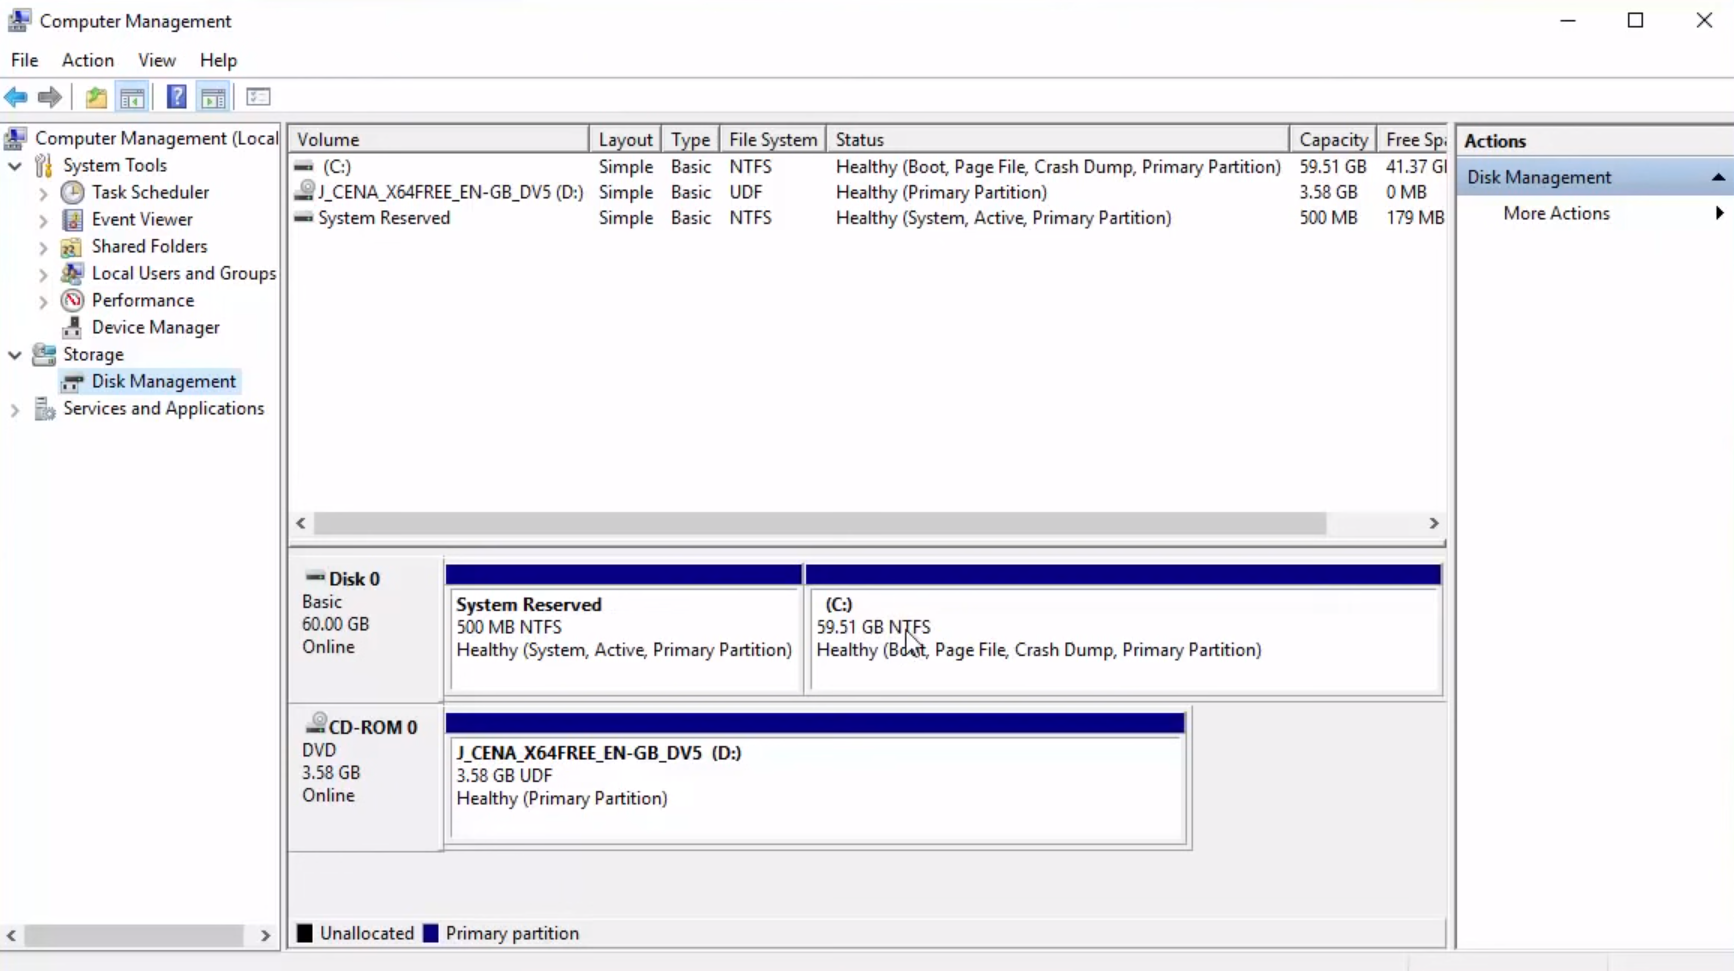
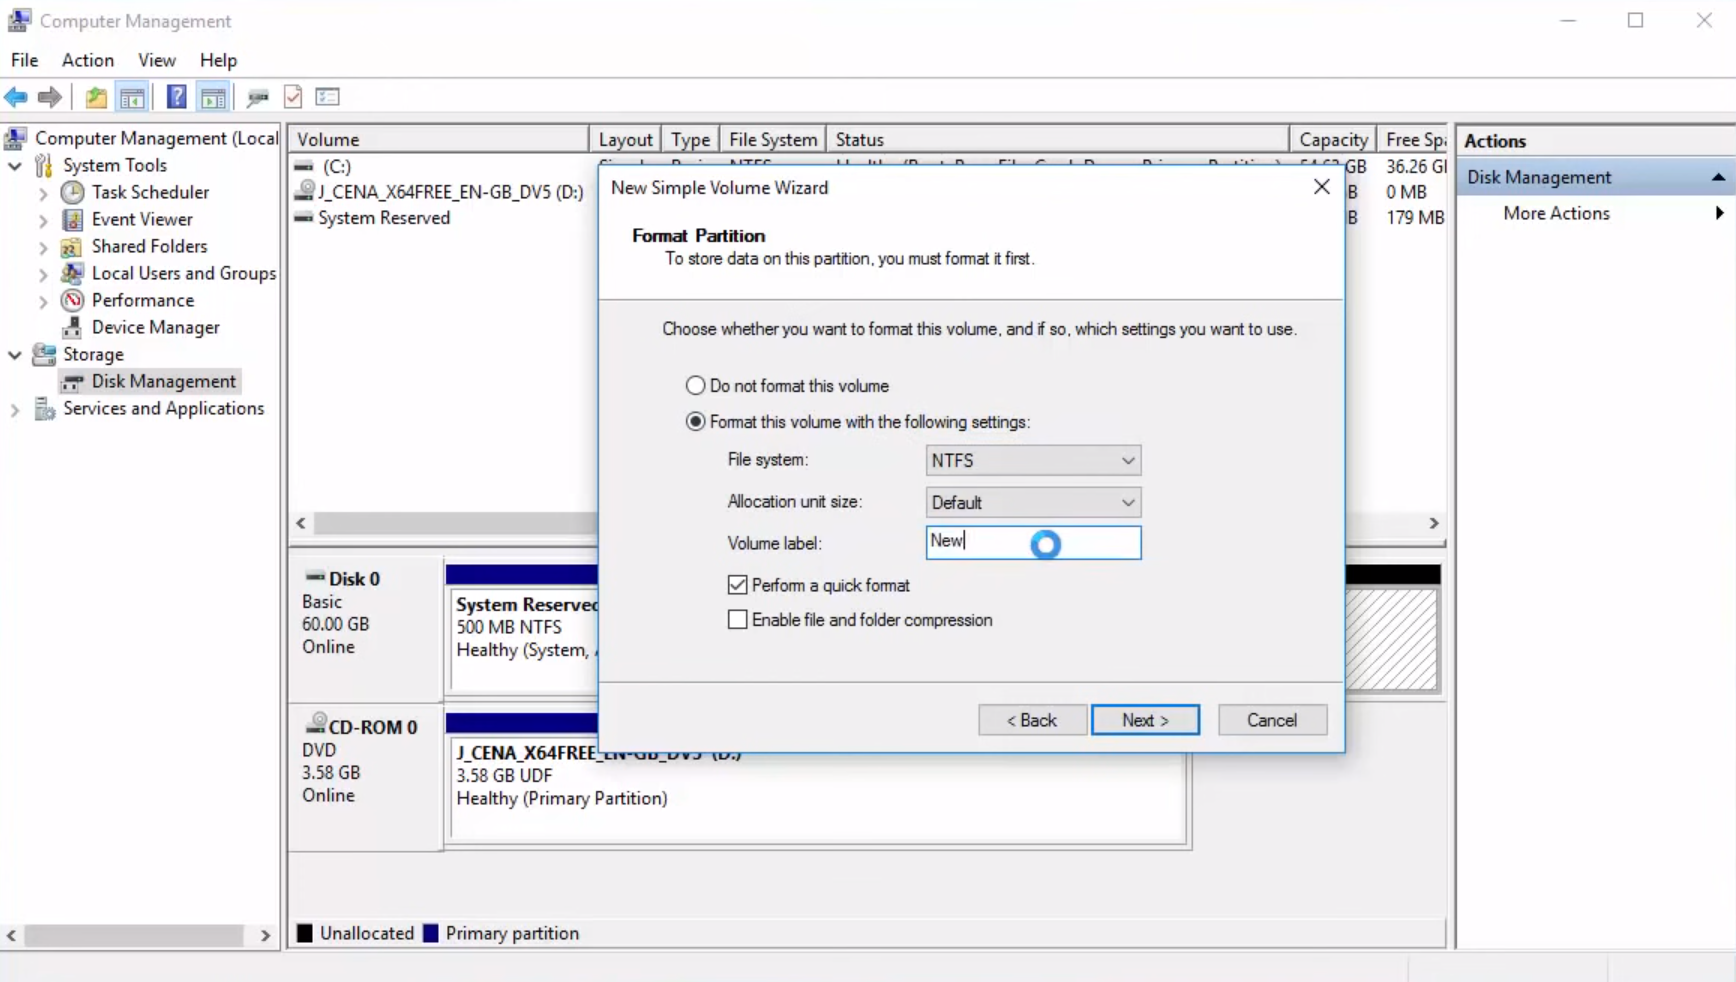
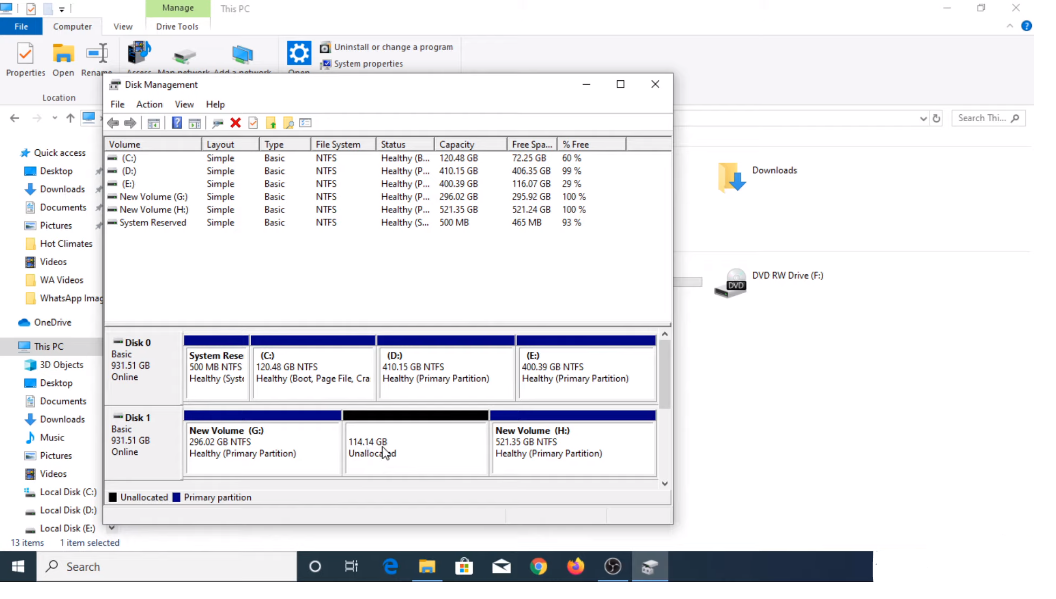
Creating a partition in Windows 10 involves using the Disk Management tool. You can open it by right-clicking the Start button and selecting “Disk Management.” Identify the drive you want to partition, right-click on it, and choose “Shrink Volume” to create unallocated space. Then, right-click on the unallocated space, select “New Simple Volume,” and follow the New Simple Volume Wizard to specify the size, assign a drive letter, format the partition, and complete the process. Always back up your data before creating or modifying partitions to avoid data loss.
Understanding Partition in Windows 10

Before you create a partition in Windows 10, it’s essential to understand what a partition is and why you might want to use it. A partition is a logical hard drive division that separates and organizes data and files. Each partition functions as a separate storage space, with its file system and drive letter.
- Organization: Partitions help you keep your data organized. You can allocate specific partitions for your operating system, applications, documents, media files, etc. This separation makes it easier to manage your data.
- Data Protection: If one partition encounters issues or becomes corrupted, the data on other partitions remains unaffected. This enhances data protection and reduces the risk of data loss.
- Multi-Boot Systems: You can create separate partitions for each OS to run multiple operating systems on the same computer. This allows you to switch between different operating systems without conflicts.
- Performance: Partitioning can enhance system performance by isolating system files and frequently accessed data on separate partitions. This reduces fragmentation and improves read/write speeds.
- Backup and Recovery: Storing your backups on a separate partition can simplify the recovery process in case of system failures or data loss.
Make Partition In Windows 10:

Important Note: Before you start, back up any important data on your computer, as partitioning can result in data loss if not done correctly.
- Open Disk Management: Right-click the Start (Windows icon) button in the taskbar and select Disk Management from the context menu. Alternatively, you can press Win + X and then choose Disk Management.
- Identify the Drive: In the Disk Management window, you will see a list of all available drives and their partitions. Carefully identify the drive you want to create a new partition.
- Shrink the Existing Partition: Right-click on the partition you want to shrink to create space for the new partition. This is typically your main system drive, the “C:” drive. Select Shrink Volume from the context menu.
- Specify the Amount of Space to Shrink: In the Shrink window, you will see the total size of the partition and the amount of space available to shrink. Enter the amount of space you want to allocate to the new partition in the “Enter the amount of space to shrink in MB” field. Ensure there is enough space left for your system to function properly. Click the Shrink button.
- Unallocated Space: After the shrinking process, you’ll see a section labeled “Unallocated” space. This is the space you’ve just freed up for your new partition.
- Create a New Partition: Right-click the “Unallocated” space and select New Simple Volume from the context menu.
- New Simple Volume Wizard: The New Simple Volume Wizard will open. Click Next to begin.
- Specify Volume Size: You can use the entire unallocated space for your new partition or specify a smaller size. Click Next after making your selection.
- Assign a Drive Letter or Path: Choose a drive letter for your new partition, or use the default assignment. Click Next.
- Format Partition: Choose a file system for your partition (usually NTFS for Windows) and enter a volume label (a name for your new partition). You can also perform a quick format. Click Next.
- Completing the Wizard: Review your selections and click Finish to create the new partition.
- Confirmation: Windows will now create the new partition listed in Disk Management.
Your new partition is now created and ready to use. You can access it through File Explorer and store files and data independently of your other partitions.
Risks Associated with Partitioning in Windows 10
- Data Loss: The most significant risk when partitioning is the potential for data loss. Any mistake made during the partitioning process, such as deleting the wrong partition or resizing partitions incorrectly, can result in losing valuable data. It’s crucial to back up your data before partitioning to mitigate this risk.
- Incompatibility: Creating multiple partitions may lead to compatibility issues with certain software or applications. Some programs may expect to find specific files or data in a particular location, and if you move or modify partitions, it could disrupt the functionality of these programs.
- Complexity: Managing multiple partitions can be complex, especially for inexperienced users. There is a risk of accidental changes or confusion about which partition contains specific data.
- Partition Table Errors: If the partitioning process encounters errors or interruptions, it can lead to problems with the partition table, making it challenging to access or recover data on the affected partitions.
- Limited Space: Partitioning can lead to the inefficient use of storage space. If you allocate too much space to one partition and not enough to another, you may run out of space on one partition while having excess space on another.
- Resizing Challenges: Resizing partitions after they are created can be risky. Shrinking or expanding partitions may lead to file system errors or data corruption if not done correctly.
- Performance Impact: Partitioning can sometimes slightly affect overall system performance. This is especially true if you have many partitions or are not properly aligned.
- Difficulty in Recovery: In the event of a system failure or the need to perform data recovery, dealing with multiple partitions can complicate the process. Recovery tools may be unable to access or restore data from all partitions.
FAQs
Why would I want to create a partition in Windows 10?
Creating partitions can help you better organize your data, improve system performance, and separate your operating system files from your files. It’s also useful for dual-booting multiple operating systems on the same drive.
Can I create a partition on my primary system drive (usually C:)?
Yes, you can create a partition on your primary system drive (C:). However, be cautious when resizing the system partition, as it can affect your computer’s performance and may result in data loss if done incorrectly. Always back up important data before proceeding.
How much space should I allocate for a new partition?

The space you allocate for a new partition depends on your specific needs. Consider how you plan to use the partition and allocate space accordingly. Leave enough space on your primary drive for Windows and essential applications.
Can I change the size of a partition after creating it?
Yes, you can change the size of a partition after creating it. You can extend or shrink partitions using the Disk Management tool in Windows 10 as long as there is unallocated space on the drive.
What file system should I choose when formatting a new partition?
NTFS (New Technology File System) is the most common and recommended file system for Windows 10 partitions. It supports larger file sizes, better security, and features like compression and encryption. However, if you plan to use the partition with other operating systems, you may choose a different file system like exFAT or FAT32.
Can I create multiple partitions on a single drive?
Yes, you can create multiple partitions on a single drive. This allows you to organize further and separate your data. Each partition will have its drive letter or path.
Will creating a new partition delete my existing data?
Creating a new partition should not delete existing data on your drive. However, resizing or modifying existing partitions can potentially lead to data loss if not done correctly. It’s essential to back up important data before changing your disk partitions.
Conclusion:
Creating partitions in Windows 10 is valuable for efficiently organizing and managing your data. It allows you to separate storage spaces with distinct file systems, providing better organization and potentially improving system performance. Following the steps outlined in the process, you can create new partitions on your hard drive. However, it’s crucial to exercise caution, particularly when modifying system partitions, as errors can result in data loss. Always remember to back up your important data before embarking on partition-related tasks to ensure the safety of your files and information.
